Road Bike Buyers Guide

UNADJUSTEDNONRAW_thumb_2a60

If you’re in the market for a road bike, there’s a lot to consider. Here, I will take you through everything I feel is important when looking at a new steed. I will explain my experiences in my years of cycling and also through working part-time in a bike shop and all the knowledge that I have accumulated. This will be an honest guide and I will explain what areas are best to prioritise on and what areas are best to upgrade in the future. I also intend for this to be an article that I will regularly update as time goes by, so do feel free to check back once every so often.

When looking at a road bike (or any bike for that matter), I feel there are 4 main areas to look at and in order of importance, here they are:

  • Frameset
  • Groupset
  • Wheels and Tyres
  • Finishing Kit

Frameset

bmc-teammachine-slr01-disc-2018-road-bike-frameset-red-black-ev302692-3085-1

Image from BMC’s website

The frameset consists of the frame and fork. In my opinion, this is most important because unless you buy a new bike, you’ve got this frameset for a while. (Or alternatively, if you’re mechanically able, you could buy a not-so-great frame with brilliant parts and upgrade the frame in the future and put all those parts onto it…) You can upgrade the parts that hang off the frame if they are not up to scratch. There are two important things to look at when you’re looking at a frameset in my opinion – frame materials and intended use.

There are generally four main types of materials used in a frame – aluminium, carbon, steel and titanium. Aluminium and carbon are the most prevalent in the bike industry and account for most mainstream bikes that are on the market. Aluminium is generally much cheaper to manufacture and accounts for bikes mainly around the £1000 mark. Carbon is generally the exotica material people crave for in a bike and can generally be found from £1200 upwards. Carbon is generally regarded as a better material as it dampens road vibrations and is much lighter and with carbon, manufacturers can create more complex tube shapes. However, it is extremely important to note that there are varying levels of both of these materials. Higher-end aluminium is much better than a lower-grade of carbon and I’d generally argue that if your budget is less than £1500 on a full RRP bike, go with aluminium as you’ll get a much better specced bike and it will feel more lively and ultimately, be a better ride.

ares-sl-fork-red_3k

Image from Dolan Bicycles

On aluminium bikes at entry level prices, it’s important to have a look at the material the fork is made from. I would only ever buy a frame with a carbon fork as carbon will dampen the vibrations on the front end before you feel those vibrations at the handlebars. I would personally steer clear of a bike with an aluminium fork – the difference is night and day.

UNADJUSTEDNONRAW_thumb_34b6

This example is a Specialized D’Aluisio Smartweld frame – note the welds near the head tube. The welding on this bike makes the frame stiffer and lighter. Specialized even have an S-Works level of the Allez, so this proves that you can make wonderful frames out of what is generally regarded as a lesser material.

Make sure you have a look where the frame material used in a particular bike ranks in a brand’s hierarchy. Specialized, for example, have two grades of aluminium – E5 and D’Aluisio Smartweld and their carbon bikes range from FACT 8r carbon all the way up (9, 10, 11) to 12r carbon reserved for their S-Works level of bikes. I would always say get the best frame you can, for the reasons I stated before, you’ve got that frame generally until you buy a new bike.

The next important thing to consider frame-wise is style of frame and then geometry. Unfortunately, there is no such thing as “a road bike”. There are many different sub-categories. This guide will exclusively be dealing with road bikes, not cyclocross / adventure / touring / TT bikes (which I may write about in a future post).

With road bikes, I would split them into four categories:

  • Endurance
  • Race
  • Climbing
  • Aero
specialized-roubaix-elite-2017-road-bike-red-ev279856-3000-1

Specialized Roubaix – this is an example of an endurance bike. The Roubaix has a taller head tube and shorter top tube so you’re more upright. It also has a FutureShock which is a cartridge in the head tube that offers a little suspension, the seatstays are dropped to offer more comfort as the seatpost can flex and the seatpost has a Zertz pad at the top, also to take some sting out of the roads. Image from Specialized’s website

An endurance road bike (people also refer to these sometimes as sportif or granfondo bikes) are bikes that are designed for comfort or longer distances. They are generally taller on the front end so you’re not in a very low and aggressive position and the top tubes are generally shorter, again so you’re not too stretched out. Many brands build in specific compliance features to aid comfort in the frame for the rider – for example, Trek and their use of IsoSpeed decouplers in some of their frames.

cannondale-supersix-evo-hi-mod-team-2014-road-bike-team-ev198012-9999-1

Cannondale SuperSix Evo – this is an example of a race bike. Compared to the endurance bike, it has a shorter head tube, longer top tube so you are in a more aggressive position. There is no fancy suspension here like on the Roubaix either! Image from Cannondale’s website

A race bike, I would argue, is the nearest definition to a road bike. These are bikes that are comfortable enough for any riding you want to do, generally lightweight but in comparison to an endurance bike, they are more aggressive in position.

trek-emonda-slr-8-2018-road-bike-black-ev311917-8500-1

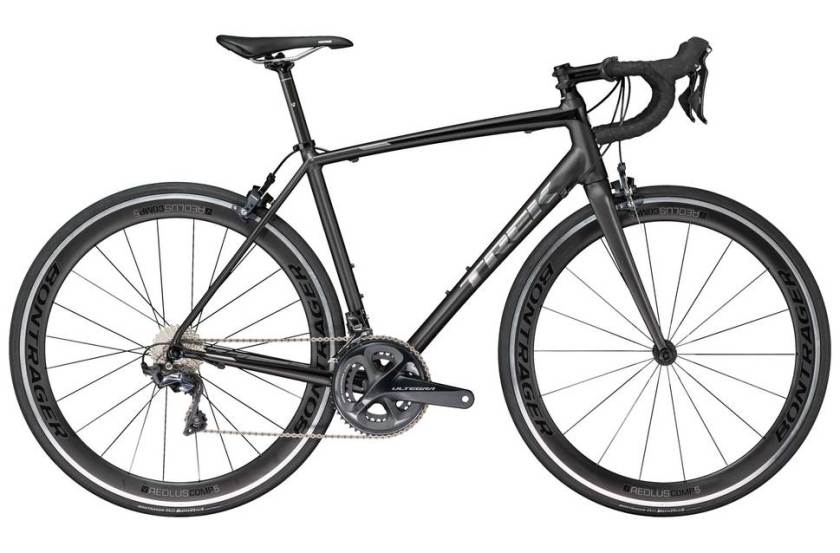
Trek Emonda – this bike is purely designed for its light weight. The frameset weighs an astonishing 640g. With this particular bike, the geometry mimics more of a race bike than an endurance bike and there are no aero features as such. Image from TrekBikes

A climbing bike, not as prevalent as the other three categories, is a bike purely designed to be as light as possible for you guessed, climbing. In terms of geometry, these borrow mostly from a race bike.

bmc-timemachine-tmr01-dura-ace-di2-2014-road-bike-team-red-ev192652-3000-1

BMC Timemachine – this is an example of an aero bike. Note the aero tubing, in particular how close the tyre comes to the frame to minimise drags. For futher aerodynamics, this bike also has integrated brakes within the frameset. The head tube will be shorter than a race bike generally and the top tube longer as well to put you in an even more aggressive, aerodynamic position.

An aero bike is a bike purely designed with aerodynamics in mind, for maximum speed. These types of bikes will quite often use aero / kammtail tubing which often means that they compromise on comfort although with bikes like the Trek Madone, this is not always the case. If you want to go as fast as possible or race and don’t mind sacrificing on some comfort, this is the bike for you.

02-img_6571

The BMC Roadmachine caters for all of these disciplines as its frame is fairly lightweight, you can use the different spacers to control how high or low the handlebars for comfort. For comfort too, it has dropped seatstays to allow the seatpost to flex and wider tyres. It is also a bike you could race on with its slight aero profiling and by putting it in its lower position. Image from RoadCycling UK – https://roadcyclinguk.com/gear/bmc-roadmachine-rm01-ultegra-2017-road-bike-review.html

Of course, road bikes aren’t strictly confined to these categories and you will find many that will fall in different places on the spectrum or even with a bike like the BMC Roadmachine, a bike that BMC envisage as ‘the one-bike collection’, designed for all of these types of riding.

I would have a good long think about what it is exactly you want to do and achieve with this new investment and go for the frame that best suits your needs. There’s no point of you buying an aero bike when your goal is to complete a 200km sportive for example, likewise if your looking at racing, there’s no point getting something more for endurance.

That said, if you buy a bike and want to adapt it to another style of riding, there’s nothing stopping you. For example, if you bought an aero bike but then found you wanted to ride sportives on it, in order to make the bike even more comfortable, you could look at sticking some wider tyres on, fitting thicker bar tape, upgrading to a carbon handlebar / seatpost. Just because you have a road bike that doesn’t quite match your riding needs, it doesn’t mean that you’re doomed. But still, if you’re in the market to purchase a new bike, you might as well get the style of bike that initially matches what you want to do on it.

To make things easier, I have created a table with many of the big brands and their different models and what categories they come under.

Screen Shot 2018-01-12 at 22.48.48

Groupset

shimano-105-5800-5236-1128-groupset-black-ev237773-8500-1

The groupset are the parts that hang off the frame, as it were, and is the collective term for the shifters, brakes, chainset, front and rear mechs, chain and cassette. I will go into more detail on a future post about groupsets but in essence, all of the major manufacturers (Shimano, SRAM and Campagnolo) have different levels of groupset to suit different price points hence why I’m going to go straight in with using all of the jargon.

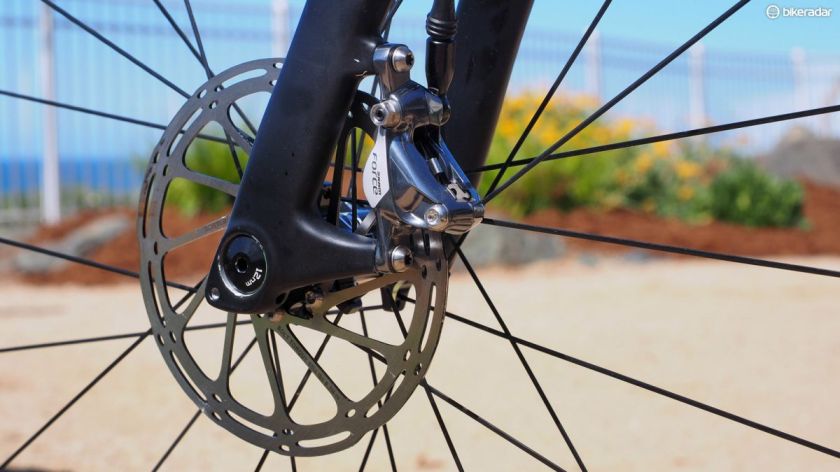
The most important thing as of writing is the braking due to the rim brake / disc brake divide at the moment. This is due to the fact that the frame needs to be specific for the braking system. I’ve previously written a detailed post on the evolution of disc brakes which you can read about here and this will hopefully help you make a decision.

With any groupset, I would urge you to go to 11-speed (11 gears on the back) with regards to gears if you can as it means the jumps between each gear are much smaller and you still have the same range. You can generally find Shimano 105-equipped bikes from about the £1000 mark and what it means is that in the future, if you are to upgrade to a presumably better bike and want to interchange wheels between them, you haven’t got the headache of incompatibility. That said, if your budget doesn’t stretch, you can always look to upgrade in the future, particularly if you do get the cycling bug.

1405660732338-bjwr9s9ekbus-630-354

Image from Road Cycling UK

Shimano tends to be the groupset manufacturer that tends to be sold on most bikes. It’s all very good stuff and works very well. SRAM and Campagnolo aren’t quite as common but all three manufacturers all offer intuitive shifting and braking at different price points. Again, stay tuned for a future post where I will go through these in more detail.

01

Two different size chainsets together. Image from BikeHugger.com – ‘ The Rise of the Compact Crank’

Pay attention to the gear ratios that are specced on the bike as well. The gear ratios correspond to the number of teeth on the chainrings and cassette. When it comes to the chainrings, most bikes typically tend to have 50/34 (50 teeth on the bigger chainring, 34 on the inner chainring), which is good for climbing and most people are comfortable with this configuration. Race and aero bikes and pro riders often have bigger gearing with 53/39. 53 means you can reach a higher speed, but you’d need to really be going some to spin out a 53-11. To accommodate in between, race bikes can also come with a 52/36 which is a nice compromise – you’ll spin out a 52 less easily than a 50 but then the climbing gear isn’t as tough as a 39.

p-025-sl-k-mosular-adventure-bb386evo-crankset_0

A 48/32 example Image from FSA’s website

Adventure Road bikes and even some endurance bikes may either have a sub-compact (which is a 48/32 or 46/30) to give you an even easier climbing gear and Cyclocross bikes are often 46/36 as the gear range that you need to cycle off-road is much closer – you wouldn’t need a 50 for example.

Some cheaper bikes or touring bikes may still come with a triple chainset which is often a 50/39/30 to give you an easier climbing gear. Bear in mind though that triples are not as efficient as you have a lot of duplicate gears.

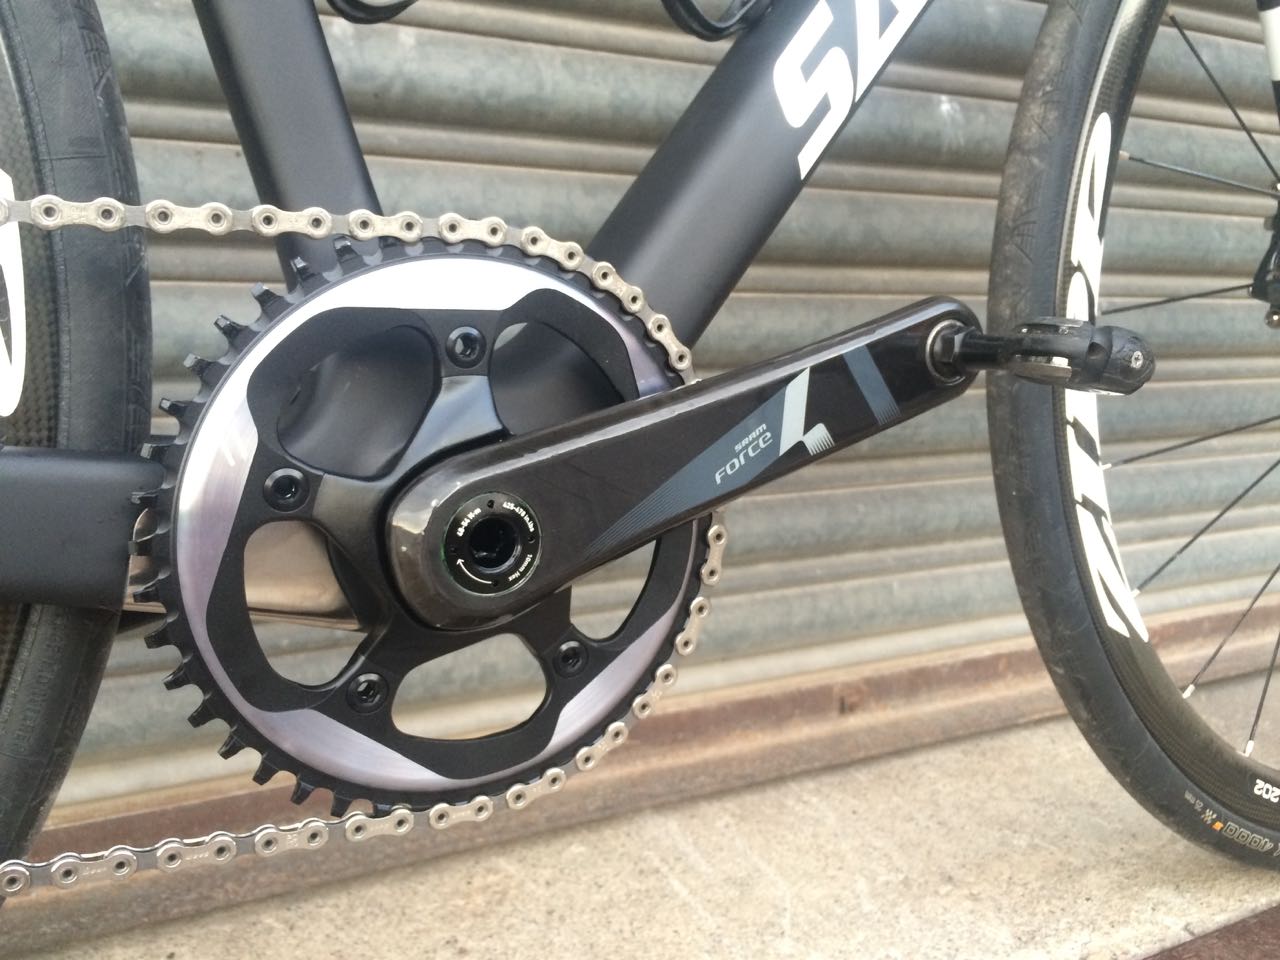
Image from FeedTheHabit.com

Some bikes, particularly Adventure Road and Cyclocross are now coming with single chainsets and a wider-range cassette at the back. This offers a cleaner look, less weight as you ditch the front mech, cable and shifter and systems such as SRAM 1x incorporate additional measures for chain retention such as clutch derailleurs and narrow/wide chainrings to better hold the chain and stop the chain slapping on the chainstays.

cassettes

Different cassette ratios

Speaking of the cassette, this is the other thing to bear in mind in conjunction with the chainset gear ratio. Most bikes come with an 11-28, offering a good fast gear with the 11 and a nice climbing gear with 28. Race and aero bikes may come with an 11-25 or 11-23 which aren’t as easy for climbing but it means that the jumps between each gear are smaller. Endurance bikes and adventure bikes may come with 11-30 or 11-32 which is a nice, wide range as you get an easier climbing gear but remember that the jumps between each gear will be bigger. With 1x groupsets, it’s not uncommon for the single chainset to be combined with a 11-36 or 10-42 cassettes to give you that wider range. However, you cannot fit these onto a normal 2x groupset as the derailleurs’ cage isn’t long enough to reach those bigger cogs.

shimano20ultegra20di22068702011spd20groupset20-20montage

Image from Shimano’s website

If you see yourself in the future wanting to upgrade to electronic gears such as Shimano Di2 or Campagnolo EPS, you need to make sure the cables in the frame are internally routed as the battery for the groupset sits inside the frame.

1436839377267-4d49g6mexhu2-630-354

This bike has specced a non-series Shimano RS500 chainset as opposed to the 105 one. It is a little heavier compared to the 105 one, but this is an easy area for the brands to save costs. Image from BikeRadar

Also, when looking at bikes, have a look and see what you’re not getting. A particular bike may advertise itself as having a Shimano 105 groupset but on closer inspection of the spec sheet, you may only be getting the 105 shifters and mechs and the rest of it isn’t 105. Brands do this, most of the time (there are some exceptions), for cost-cutting purposes. A bike might have an FSA chainset for example, or a KMC chain or Tektro brakes. I wouldn’t worry too much about these, particularly for a chain for example as you’ll end up replacing that at some point anyway after it’s worn. However, I would be a little weary if the brakes were downgraded, such as Tektro as these typically won’t offer as much stopping power and may lack bite. You could change the pads out for some cartridge pads once they’ve worn out and that will dramatically improve them or perhaps upgrade in the future.

Wheels and Tyres

gp4-1465440856138-nlyb8jh7xpkk-630-354

Image from Mantel.com

Wheels and tyres are paramount to how your bike rides and a good set of wheels and tyres is a vast improvement compared to a shoddy set. With most bikes, the wheels and tyres are unlikely to be up to par with the frameset and groupset and this is often deliberate. What would be the point in buying a bike with deep section, aerodynamic wheels when you’re after a really shallow, lightweight set?

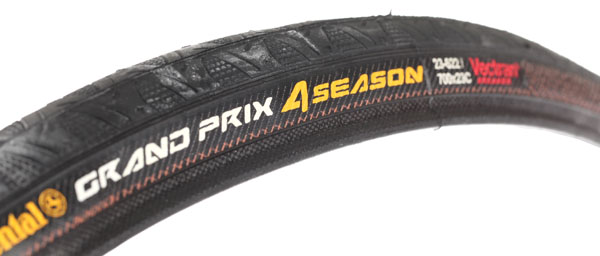
Unfortunately this logic doesn’t quite translate with tyres and tyres are in my opinion, even more important, than wheels as they are your main contact point with the ground. Unless the tyres that come on the bike really are pants, I don’t see any need in upgrading straightaway as you may as well wear out the tyres that came on it and then subsequently upgrade. However, when it does come to buying new tyres, do not skimp – even the ride of an utterly rubbish bike can be transformed with good tyres as is the case the other way around.

When it comes to upgrades, the wheels and tyres should generally be the first thing you do as it will make the world of difference to your bike – tyres, again because they are the main contact point with the ground but also wheels because it reduces rotating weight. You’re far more likely to reap more benefit upgrading your wheels as opposed to a stem for precisely that reason.

trek-emonda-alr-6-2018-road-bike-black-ev311998-8500-1

The wheels on this Trek Emonda ALR are in line with the rest of the build on the bike. Image from Trek Bikes

I have noticed a couple of brands such as Trek, for example, are beginning to offer consumers the option of the same bike but with an upgrade in wheels for a nominal cost. If the wheels suit the type of riding you want to do, this is probably a brilliant deal and saves you the job of upgrading down the line. But for I’d say 90% of cases, the wheels are always sub-par in comparison to their respective frameset and groupset they’re paired with.

Finishing Kit 

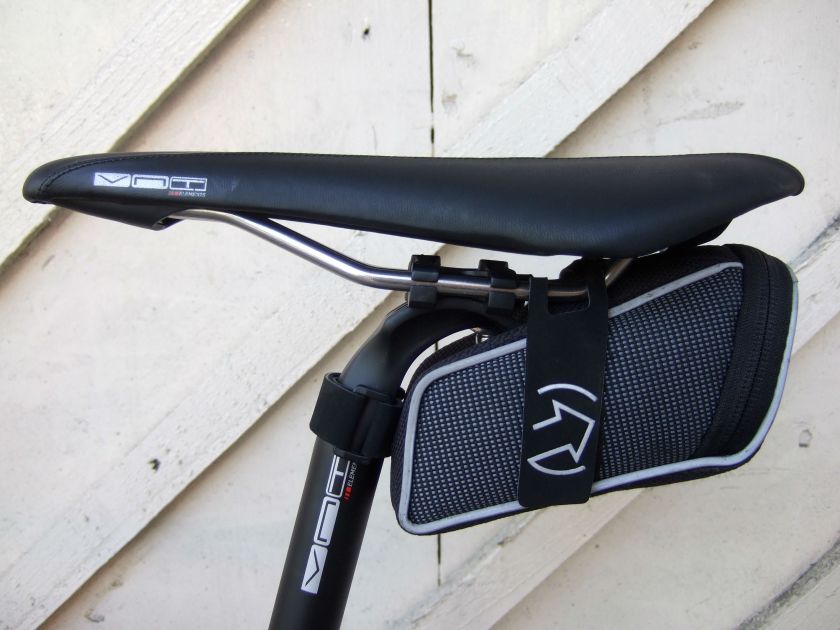
The finishing kit is essentially the rest of the bike – the seatpost, saddle, handlebars and stem. These aren’t as important as the frameset, groupset and wheelset but are still something you should have a look at.

However, what is important is I would set some money aside (included in your budget) for potentially, a new saddle, handlebar and stem. It is impossible for manufacturers to spec these parts perfectly for you as everyone is so different. I wouldn’t rush with changing them straightaway (except maybe for the stem as this aids in bike fit) but after a few rides, you’ll know whether or not these parts work for you. I won’t go into what saddles or handlebars you should look at here but don’t be surprised if you find you need to change these.

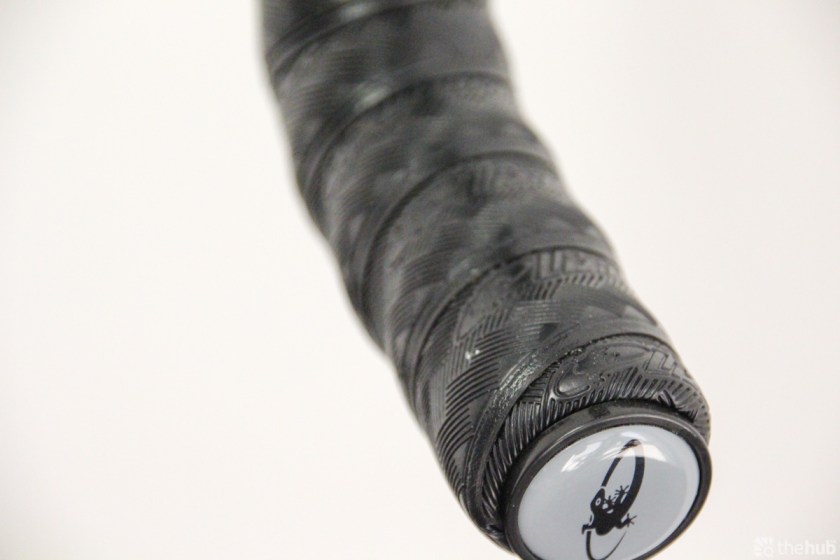
Whilst not essential as well, it would be worth having a look and seeing what material these parts are made from. Most of the time, they’ll be aluminium but carbon is a nice upgrade in these areas (not always for saddles though) as it can aid in comfort as they dampen vibrations from the road.

A Note on Prices 

I just wanted to highlight as well that you really don’t need to spend a ridiculous amount of money on a bike. From experience of working in a bike shop and from my own personal riding of riding bikes at different price points, the biggest differences in spec come towards the comparative lower end of the market. The minimum I would spend on a bike would be £400 (as of present) as generally but not always, anything lower is likely to be majorly flawed in some way – I’ll reiterate a point I made earlier on in that I would never buy a bike which didn’t have carbon forks on it.

The biggest differences come as you go up to the £1000 mark and I would say £1000-1200 would be where you could find a brilliant Shimano 105-equipped high-end aluminium frame. Notice that in the space of £500-700ish the lengths of difference from comparative Shimano Tourney or Claris-equipped bikes at the beginning of the range. Of course, you need to take every single bike you look at for its own merits but I have found this generally to be the trend.

I personally wouldn’t bother with carbon unless you want to spend upwards of £1500 as generally but not always (unless there is a sale), it will be inferior to its higher-specced aluminium alternative both in frame and components. As you spend even more venturing into the £2000-2500 category, you then get better quality frames and higher end components. And then after that, you then access the best frames with the best components but I personally see no need to spend more than £3000 as you then start to spend a lot more money for not all that much difference.

Summary

I hope everything here makes sense to you and if you have any questions at all, please feel free to leave me a comment and I will get back to you promptly. It can be a daunting process buying a road bike but I’m of the philosophy that I’d much rather you know what you’re buying than just blindly head down to the bike shop  or press the ‘order’ button online and pick out the first thing you see. After all, a good bike could be the make-or-break if you choose to pursue cycling or not.

I must stress that it is difficult to find the perfect bike that ticks all of these boxes. You may find you need to compromise somewhere, but with your own research and from my experiences that I have detailed in this article, hopefully you can work out what would most suit you.

Happy Cycling!

Advertisement

The Evolution Of Road Disc Brakes

1449186738232-nvl28sa4ulhi-1200-80

“Disc brakes”, I hear you say, “not this petty argument again.” You would be right and I cannot agree enough how sick I am of people complaining that they don’t need them and that they are fine with rim brakes and vice versa. This isn’t what this article is about – instead, I am going to highlight how I feel they have evolved over the last couple of years and how we are getting even closer to a better set of standards. Rim brakes are still brilliant in their own right as they allow you to have a generally lighter bike and still offer excellent braking and it’s good to see brands such as Trek, who offer consumers the choice rather than forcing you into one type of braking. Looking at a lot of the 2017 model year bikes and the majority of bikes for 2018, it is clear that disc brakes have evolved a lot since their inception into road biking. Let’s take a look at this apparent path of evolution.

bicycling-brakes

When disc brakes were first announced on road bikes, many of them were mechanical disc brake systems (operated by a cable, not hydraulic fluid) which in my opinion, are lacking. I can see the benefits to mechanical for those who tour in that it is easier to get hold of a cable as opposed to specific hydraulic fluid. However, mechanical disc brakes are subject to cable stretch and require a lot more maintenance than hydraulics which self-adjust as the pads wear. You don’t get as much modulation and feel or bite compared to hydraulics. In my opinion, they’re not really good for anything and brand such as TRP introduced the Hy/Rd which is a part hydraulic system but to be honest, I would agree with Matthew Allen’s assessment in a recent BikeRadar article that this is a solution to a problem that shouldn’t exist in the first place. Of course they’re cheaper than going the whole hog to a hydraulic system but as you will see, as is the case in the bike industry, now that disc brakes on road bikes are no longer in their infancy, they have been subject to trickle down to lower levels.

Hydraulics were introduced onto road bikes by SRAM and Shimano which instantly propelled this technology and improved the quality of braking on these various road bikes that came equipped with them. However, hydraulics were still in their infancy. Both Shimano and SRAM’s levers were considerably more bulbous in order to house the reservoir for the hydraulics.

Shimano weren’t confident from the outset of their hydraulics and didn’t incorporate them into their groupset line, instead labelling their levers with part numbers – R785 for the electronic-hydraulic lever, RS685 for the mechanical-hydraulic lever that was aimed at the Ultegra level, RS505 for 105, RS405 for Tiagra. The latter two are perhaps the most ugliest shifters I have ever seen (although this is personal opinion) and also affect fit of the bike as it means that your hands are further out on the hoods. As I work part-time in a bike shop, these two models do complicate the fitting process as you have to account for this. These later models have been introduced throughout the years and it’s refreshing to see Shimano offer hydraulics at the Tiagra level. Whilst these systems all worked well, it was interesting to see that Shimano weren’t confident enough to incorporate these levers into their official groupset line.

95558_02_d

SRAM did however incorporate hydraulic braking into their line of groupsets but then famously suffered a widescale recall in late 2013 due to some quality control issues. Although the replacement was still considerably more bulbous, it was a lot smaller than the original iteration.

It is very interesting to note Shimano’s recently announced Dura-Ace and Ultegra groupsets and Shimano have now totally revamped the levers, rotors and callipers and have branded them into these levels. It is astonishing to see, the Dura-Ace version in particular, maintain the same shape as the cable-actuated version and this is proof that you can get these levers to the same size in order to get the same feel. If you’re going to go for Shimano disc brakes, I would say now is the time where you can finally feel confident.

SRAM haven’t yet announced their next generation groupsets but I am confident that they will follow suit with the way that Shimano have done. This just leaves Campagnolo alone in the water, who are only just beginning to bring out their own hydraulic systems.

The actual brake itself though isn’t the only thing to consider when it comes to disc brakes. You also need to consider the size of rotor, how the calliper attaches to the frame and how the wheel attaches to the bike. This is why disc brakes have been quite a complicated affair over the years and why they haven’t yet been introduced into the pro-peloton. If you needed a spare wheel from neutral service, how would you know if the wheel you were getting would fit the same standards as your bike?

When it comes to rotor size, the bigger the rotor, the more powerful the brake. With road bikes, you don’t need anywhere near as big a rotor as you would on a mountain bike and at first, the standard seemed to be 140mm. However, other brands spec 160mm and some brands spec 160mm front, 140mm rear such as my Norco cyclocross bike. This standard still isn’t set in stone but with brands releasing adaptors to convert between the two, this certainly helps and I suspect 160mm will be the preferred size as time goes on.

In terms of mounting, the two types are flat-mount and post-mount. Post-mount pretty much follows the IS standard it replaced from mountain bikes whereas flat-mount discs sit flush against the frame and make hose-routing (particularly when the hose is routed internally through the frame) better. Again, you are able to convert between the two depending on what standard your frame is but in my opinion, this makes the bike look quite ugly. Each to their own though.

fullpage_3

(Left) Post-Mount, (Right) Flat-Mount             Images from BikeRadar

Keeping in tune with how disc brakes have evolved over the years, it looks very much like flat-mount will be the main standard and is much more predominant on 2017/18 bikes than it has been before. Shimano, who invented the standard, only sell callipers for their new Dura-Ace and Ultegra groupset in a flat-mount configuration.

The final thing to consider is how the wheel attaches to your bike. At first, quick-releases (QR) were used which are good enough but there is always an element of adjustment with them which means you need to position the wheel perfectly so your disc rotor doesn’t rub. There is also the very small risk that the forces exerted by the disc can cause a QR to loosen.

scott-bikes-2015-road-disc-flat-mount-12mm-thru-6

Image from BikeRadar

Thru-axles (TA), carried over from the mountain bike world, are now popular on road bikes with disc brakes as it makes the frame much stiffer as TA’s only go into the frame in one direction and it also reduces the risk of disc rub. It is also more difficult overtighten them as a lot of them come with a preloaded torque. Systems such as Focus’ RAT system make this process even easier – the RAT system requires a quarter-turn to undo which makes wheel changes even quicker.

In terms of standards, at first there were many. On the front, 100×12 and 100×15 for example (and on the back, 142×12 and Specialized’s infamous 135×12 (more on that in a minute). These dimensions refer to the size of the thru-axle and the frames that manufacturers released were also specific to these sizes. You can’t change between them because the thru-axles need to be specific to the frame. Looking to the present, it now looks as if manufacturers have settled on 12mm front and 12mm back. However, wheel manufacturers such as Zipp give you different end-caps with their wheels so you can swap between them all and also QR.

You also need to consider how the thru-axle is removed from the bike. Some have a lever-design with a ratchet, some require an allen key to remove them, some such as DT Swiss’ lever can do both. Carrying around an allen key to take your wheel off is a bit of a faff but it does make the bike look cleaner and of course, the industry is always chasing for integration and aerodynamics. When you look at how this aspect could be a dilemma in the pro peloton, it could mean that certain riders can get their wheels changed quicker than others which is a little unfair. But for the likes of you and me who presumably don’t race professionally, surely the added security and stiffness of a thru-axle is a better benefit than a faster wheel change.

So taking all these standards into account, it looks like the industry will go for 140/160 disc rotors, flat-mount disc brakes with 12mm thru-axles front and rear. This would make sense and would mean that because these are all the same, if neutral service were to carry wheels of this spec or if you were to buy or swap your disc-brake wheels from bike to bike, they would interchange together.

Now that we’ve looked at the actual disc brakes, the models and the various standards that go with them, we finally need to have a look at the frames that manufacturers have made to accommodate disc-brakes.

Frames in most cases, need to be specific to the braking. A disc frame needs to be able to react well to the different forces a disc brake exerts compared to a rim brake. Generally, they are a bit beefier and a little heavier to accommodate this. When you look at geometry charts, it’s often quite telling to see how in most cases, manufacturers need to change the geometry to suit.

Have a look at chainstay length for instance. Generally, the shorter the chainstay, the more nimble the bike will handle on the back end and it’ll mean a shorter wheelbase too (distance between the axles, a longer wheelbase means a more stable bike, a shorter wheelbase means more nippy). However, this affects the chainline and the groupset brands specify a chainstay length of 420mm needed to ensure good performance of the gears. You don’t really need to worry about this on endurance bikes as they tend to have a longer wheelbase anyway as they are designed for comfort. However, when brands such as Specialized made disc-brake versions of their Tarmac and CruX for instance, typically bikes designed for racing, you don’t want to change the properties of the frame as if you have longer chainstays than their rim-brake counterparts, this then affects how the bike handles as it’ll have a longer chainstay which will mean more stable.

Specialized infamously tried to combat this by introducing SCS (Short Chainstay System) and to do that, it had to change the rear thru-axle size to accommodate this to 135x12mm. This received uproar as it meant that many wheel brands didn’t support this size and you were only tied to Roval (Specialized’s in-house brand) and a few others for wheels. Cannondale have managed to do this in a slightly more friendly way and additionally create further mud clearance on their cyclocross SuperX bikes by redishing the rear wheel 6mm to the right.

As you can probably tell, there is a lot to consider when it comes to the method of braking you go for when it comes to picking a road bike. But I now feel that with a solid set of standards seemingly set, now is a much better time to make the jump if you’re unsure as it looks like you will be supported in the years to come. My next road bike will certainly be disc as I feel that the manufactures have reached a high-enough level. The manufacturers will only further improve and now that they all seem to have more confidence in their own product and have managed to make the levers an almost indentical to their cable-actuated counterparts, it shows that this technology is being taken seriously.

Winter-Proof Your Steed

Winter really will take a toll on your bike, so it’s a good idea to either have your bike ready or get it ready now as the weather takes a turn for the worst. Here are my tips on how to winter-proof your beloved steed:

dolanpreffisiored

Image from Dolan Bicycles

Winter Bike

If finances allow, invest in a Winter bike. This will prove economical in the long run and there’s no better feeling than jumping on the nicer bike in the Spring and having a morale boost. Opt for aluminium in a winter bike rather than carbon and go for a lower down groupset such as Shimano Tiagra / 105, Campagnolo Veloce or SRAM Apex / Rival. Put the carbon Cosmic’s away and have some reliable, steady Winter wheels such as Mavic Aksium’s or Fulcrum Racing 5’s. Websites such as Ribble (www.ribblecycles.co.uk) or Dolan (www.dolan-bikes.com) offer Winter builds with full-length mudguards fitted as standard. A cyclocross bike would do the job well too.

sks-mudguards-narrow-road

Mudguards

This will keep not only your bike cleaner, but also yourself and fellow riders. Full-length mudguards work best but are a pain to fit, but even a set of clip-ons will suffice.

conti4seasontire_zpsf2932b39

Image from Mantel.com

Tyres

Stick some wider, more puncture resistant tyres during Winter for added comfort and less likelihood of having to fix punctures. Opt for a 700x25c or 700x28c tyre for more comfort. Unlike a winter bike where you go for a cheaper build, winter tyres are an aspect where you should get them right. I really like the Continental Grand Prix 4 Seasons as they have the perfect balance between speed / puncture resistance and comfort. If you look around, you’ll quite often pay much less than the full RRP.

exposure-bike-light

Image from Exposure

Lights

The days are shorter in Winter, so have a good pair of lights permanently mounted onto the bike just in case you get caught out. I like to have 2 on the front, 1 flashing and 1 static so I am better seen.

Saddlebag

It’s a good idea to free up some space in your jersey pockets for other Winter essentials so stick your tools in a saddlebag. Winter’s not a weight contest, so the extra weight here is worth it. Never use a frame bag!

ccs-62657-0-10092800-1430229986

Image from TheHub

Bar Tape 

Not an essential but it’s a good idea to wrap some thicker bar tape to reduce vibrations from the road and improve comfort. I really like the Lizard Skins DSP 3.2mmm Bar Tape

Image from Park Tool

Servicing 

It’s a good idea to either service your bike or get a bike shop to service your bike before the Winter season and after to ensure your bike is in the best condition it can be. There’s nothing worse than having a mechanical during the pouring rain and freezing temperatures. Also, make sure you clean your bike regularly (I clean mine every ride in the Winter) to get rid of road spray and grit on the icy roads. This will also prolong the life of your drivetrain components, particularly your chain and cassette.

Your bike now should be ready for Winter!

Buyers Guide To Winter Clothing

Bike blog : A young woman rides a bicycle under heavy snowfall

There’s been quite a few guides published recently on bike websites such as Bike Radar, Road.cc and Cycling Weekly to name a few. This guide will detail my experiences of what to wear for Winter. Whilst it will undoubtedly draw parallels to other website’s guides, I hope you can take something away from my guide.

The key thing to recognise is that if you are a novice to road cycling and it is your first Winter, Winter clothing is an expensive outlay but remember, it should last you for years and that outlay will pay dividends in the long run. From experience of working in a bike shop, many customers skimp on winter clothing. Remember – buy cheap, buy twice! The saying couldn’t be more true here.

Helmet

Your normal helmet is fine, but if you own an aerodynamic helmet, Winter’s a great time to wear it as it will keep your head even warmer due to a lack of ventilation!

60714-174_hlmt_sw-evade_blk-red

Cap / Skullcap

These are two brilliant, cheap investments and will really keep your head warm. You don’t need to spend masses here – just something nice and simple and your head will thank you for it. Wear a skullcap when it gets below 5 degrees.

bk

Buff

Another good, cheap investment – this will cover the opening between your jersey and your neck and stops the cold from getting in.  A buff can be substituted in transitional weather (as Autumn changes to Winter) as a bandana for your head and can also be used in the Summer as a replacement for a cap.

18-tubular-scarf-buff-1

Eyewear

I personally do not currently use any eyewear when cycling as I find it distracting, but I can understand the reasons why you should. It stops your eyes from watering up and improves vision, so these are important. Swap your Summer lenses for a clear lens if you can.

1822762-oakleys-radarlock-sunglasses-feature-lenses-that-pop-out-like-doors-rotator

Base Layer

A very important component of winter clothing, a good base layer will help wick away moisture. You don’t need to spend masses here, although the more you spend the better the base layer is at wicking away moisture.

TIP – Base Layers from Decathlon (an all sports shop) are fantastic value and cost £2.99 per base layer. I have a mountain of them as they’re so good! (https://www.decathlon.co.uk/300-longsleeve-cycling-baselayer-black-id_8217439.html)

13076_castelli_seamless_short_sleeve_cycling_base_layer

Jersey / Jacket

Definitely wear a long-sleeved jersey, ideally one made of merino wool to help keep you warmer. When it gets really cold, try experimenting with wearing another base layer or maybe wear your thinner, more breathable Summer jersey underneath your Winter one.

A jacket is not essential, but is a very worthy piece of clothing. For transitional weather, something like an Endura Packajak (http://road.cc/content/review/46972-endura-pakajak) will do the job and you can just pull it out when it starts to chuck it down. You can also buy Winter jackets that could be used as jerseys as well which are extremely good, but you will pay a premium for them. It’s very hard to buy a cheap winter jacket that is windproof, waterproof and breathable – the Castelli Gabba for example (http://www.cyclingweekly.co.uk/reviews/jerseys-tops/castelli-gabba-2-jacket) is designed to do all three at a premium but does the job excellently.

4514512-059r_3000_3000_140703010622

Gloves

Gloves are an essential piece of clothing as they keep your hands and fingers warm. Gloves are a pain because they take a bit of experimenting to get right (you may find you’ll buy three pairs before you find the right one) but gloves should be used all year round anyway. Perhaps experiment with a thin layer and then a thicker glove over the top in very cold conditions.

Image by Henry Robertshaw, Cycling Weekly article – https://www.cyclingweekly.com/reviews/gloves/castelli-diluvio-gloves

Bib Tights

An extremely important piece of clothing – DO NOT skimp here. In conjunction with the correct saddle, a quality pair of bib tights will improve comfort massively. Definitely buy ones that are padded. In transitional weather, you could buy some 3/4 length ones (I don’t) or use arm / leg / knee warmers. Articles such as the Castelli Nanoflex Bib Tights even protect you from rain to a degree as they trap particles in the middle of the garment – but it’s not fully waterproof. It’s a good idea to have a couple of pairs so that you don’t end up washing your kit all the time.

scott-authentic-cycling-bib-tights-220718-black-red-lime-green

Image from Scott-Sports

Arm / Knee / Leg Warmers 

An alternative to 3/4 length bib tights are knee or leg warmers. These are great for transitional weather and in the height of Winter, you could even use these as an extra layer under bib tights. A very worthwhile purchase.

10109_1

Image from Moose.Eu

Overshoes 

Wear these over your shoes to keep your feet and toes warm. You could even buy a dedicated pair of Winter cycling shoes, but these are probably a more cost-effective option. If possible, buy multiple sets of overshoes for different weathers – I find mountain bike overshoes better as they’re thicker and thus warmer. Some brands, such as Castelli have introduced a “Toe Thingy” which is essentially half an overshoe – a good idea for transitional weather. (http://road.cc/content/review/69980-castelli-toe-thingy)

TIP – Try wrapping silver foil around your feet before putting your shoes in. Your feet have the effect of a baked potato and this is a simple, inexpensive way of keeping your feet even warmer from the elements.

assos-overshoes-hi

Image from Road.cc

Summary 

So you should now be on your way to a warm, comfortable Winter period on the bike with the right clothing. Yes, it will cost you if this is your first time but remember, this should all last you a long time.

IMG_0175